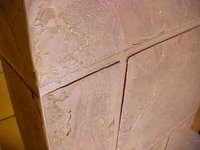
I watered down a dark brown with half water (you can use glaze medium) and went over the texture with a paint brush and rubbed with an old t-shirt. I probably could have used even less paint because it covered almost too well.
 I concentrated the color on the edges of the stones and made it lighter in the middle. I was trying to pick up all the texture of the wall and have the paint color fall into the cracks. I made little crosshatches of full color on about 4 stones and then went back with the brush almost empty and blended the crosshatches and then I rubbed and tamped with the t-shirt to blend and feather.
After I was happy with that layer, I got some stain with poly and went over the whole thing. I thought it was going to be too dark but I liked it. It filled in most of the white areas left behind from the painting and made the stone more alive.
The last step was adding a bright gold color wherever there was any white left behind. I used a toothbrush and rubbed it off with a t-shirt but I would have used an artist's brush if I'd had one.
One thing I wished I had done is put in the yellow accents first before I did the stain layer because it dulled the stain when I wiped. I ended up doing two stain layers and could have probably done one.
The stain had poly in it and so it made the rocks look smooth and life-like. I also liked the way it shaded the grout lines and made the edges of the stone go almost black.
There will be a part 3 when I figure out the keystones. I've carved one from drywall and it looks pretty good but I may do a whole piece and carve it. I'm thrilled with the stone effect and will probably have to find a place to put it in our house.
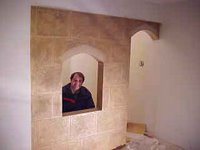
 Here's King Jeff enjoying the view from his castle window.

1 comment:
I have to say this was an incredibly smart use of this space. What are you going to do with a little nook in the basement right at the bottom of the stairs? Turning it into a castle/secret garden playhouse was brilliant. As my apprentice, she has earned immunity this week!
Post a Comment