Sunday, March 09, 2014

Naomi Gay - Muse of the Week

You know those painters that you come across and you have to create a whole new folder for? Naomi Gay (Nam Nam) is one of those painters. If you look on her Facebook business page there are dozens of save-worthy photos of gorgeous and inspirational eye designs. And what's really fabulous about all of them is the uniqueness of them all. Some have feathers, swirls, tribals, roses, zebra stripes, dragon flies....WOW!

I noticed on her Facebook page that she is offering classes...Shame on you painters in the UK if you don't go. I would be there in a heart beat. Some of you know that my eye design board is my most popular at parties and makes me LOTS AND LOTS of money at fairs. I've even suggested to Marcela that she be invited to FABAIC in the future because I think eye designs are so valuable. They capture a whole market of tweens and adults that might not consider face painting otherwise.

Here is her professional Facebook page: NamNamsFacePainting

Here is her website: namnams.co.uk

Here is my attempt at one of her easier eye designs. You'll have to see if you can find it in her Facebook photos. Make sure you like her page while you are there. :) I'm hoping I'll get better and better at the swirls and flairs that are her signature, she makes them look so organic and effortless.


Friday, March 07, 2014

Building Fairies for ¿Pintamos? Facepainting España

About six weeks ago, Pilar of ¿Pintamos? Facepainting España contacted me to do another article similar to the Building Christmas Designs article that I had done for the December 2013 issue. I decided to focus on building fairy designs but had a whole page of design possibilities. I decided the narrow it down to three wing types and 6 embellishments and had so much fun creating them that I ended up with a LOT of designs. I didn't know what she was going to do with everything!

Well, the issue just came out today and I LOVE it. The editors did a fabulous job of combining the step-by-steps I'd sent over with the real life designs I'd painted on the Roberts family. I wasn't sure how they'd pull everything together but it's a lovely article and I hope that it's helpful by showing how easy it is to change up a design and get a totally different look depending on the element and the finishes chosen.

Check out the rest of the magazine. I know it's in Spanish, but the pictures are worth a thousand words. There are cute little bugs, bunches of butterflies, using stencils, focal points of the face and girl superhero designs. They have an article on Mark Reid, Margi Kanter and Jennifer Parker too.

Here's the link:

¿Pintamos? Facepainting España


Sunday, March 02, 2014

Nurit Pilchin - Muse of the Week

I would like to start honoring artists that inspire me to try something new by starting a weekly "Muse of the Week" blog post. These are artists that paint something so inspiring or innovative that I immediately want to pick up my paint brush. Nurit Pilchin is just that person. I've been a big fan for awhile now but she's been posting fabulous photos of butterflies on her daughter so I had to try one. I've used her techniques before on a small scale but I really wanted to go all the way today.

I used her tutorial slide show of a Bronze Butterfly from Youtube.com: http://youtu.be/ExMpdUCW8ME

And this is what I painted...


Here is her Facebook business page. Be prepared to be amazed!
https://www.facebook.com/Nurit.Face.painting

Here is her website. She's a painter from Israel:
http://facepainting.co.il/

Thursday, February 20, 2014

Perfect Practice Makes Perfect

"Perfect practice makes perfect" - Marcela Murad

I was putting together some designs for ¿PINTAMOS? Magazine, a spanish-language face painting magazine. I wanted to do several fairy designs and I figured out a great way to practice the standard designs. I sponged on the rainbow base on the face template first, let it dry and THEN put it in report covers (you know, the ones we used to use in school with the plastic spines. I had found a whole box at a thrift store and hadn't used them until now.)

They are a little easier to use than the sheet protectors because you can open them, but sheet protectors would work great also. And I also found out that you can nest them again (like when I did a fancy stencil and didn't want to have to re-do it) and go over the top of that and I could still see the design to paint. It's fabulous for trying different kinds of line work patterns or trying different paint color combos. It's kind of like those overlays that cartoon illustrators do.

Using overlays to try different aspects of a design...AND save paint

I created these blank faces from a template I got in Marcela's class when she came to Salt Lake City. I edited them to have open eyes and closed eyes and have different skin tones. They are available in several face painting Facebook groups like New Face Painters & Face and Body Painters. If you would like a PDF with all of them, email me. It includes a white version if you don't have a color printer, you can it to a copy center and print it on different skin tones. I like having different tones so that I can see my white line work and it makes it seem more realistic.

Face printed on color paper
I've also laminated a few faces for quick line work practice. It works surprisingly well if you have your paint consistency right. If you don't, it will bead up if it's too wet and streak if it's too dry so that is helpful too. If you are on a tight budget, you can get a tube of white and black craft paint and cheap paper at the Dollar Tree (or recycle some paper or even magazines) and practice your tear drops, tiger stripes and swirls with that. It's also good for practicing brush calligraphy....BUT NOT FOR REAL FACES!!! You wouldn't do that, now would you. :)


Friday, February 14, 2014

Stenciled Branches

I got this stencil from a fellow painter who was selling a few things and I hadn't used it. I think it's supposed to be for cracks in skulls. Well, I saw it with new eyes tonight when I was digging through my stencils and realized it looked an awful lot like the branches I make for cherry blossoms. I love the randomness of it and the knots and spiky branches...perfect yin & yang for blossoms.


Tuesday, February 11, 2014

Gold Rush!

Every painter is on the look out for a good gold face paint. I started with TAG Pearl Gold and it's actually pretty good  and I LOVE it mixed with Pearl Copper in a split for leopards and girly tigers. It's only drawback is it seems a little light on the skin because it's a bright gold. I got some Mehron Gold powder after I took Pashur's body painting class, which is amazing mixed with mixing liquid and I used that with my TAG for awhile and liked it. It is a little messy and I'm a little afraid I'm going to dump to much or it will tip over and make a big powdery mess.

Then I tried the FAB Gold Shimmer because another painter sponged it on my arm and it really shined...however, on the job I've had a really hard time using it with a brush and it seems to have a hard time leaving my sponge...I know, so scientific..but that's what it feels like. I usually end up laying it down and then having to go over it but it is a great shimmer when I finally get there...but it feels tooooo long.

Recently I'd heard good things about the Paradise new Brilliant line. I loved the silver when Lizz Daley let me try hers at a jam. I wasn't impressed with the Gold...so why did I buy it? PEER PRESSURE! :) I don't think they changed the original recipe from the original. It reminds me of the gold I dug out of the Paradise 30 pot palette I bought. I have to dip my brush about 3 times just to make it liquid enough to use with a brush and then there is too much paint in the brush.

When I was brushing I tried to stay pretty consistent. I would dip my filbert or round, tap on the towel and load until I got smooth paint. I had a hard time with Paradise and had to add a lot of water and brush a little wetter and goopier than I'm comfortable with. When I added the Mehron powder, I would tap off the wet brush, dip it into the powder to pick up a touch and then work it up as usual. It usually required a little more water. The powder would also give the golds a slight tint so it looked more like Paradise gold.

So, here are the golds in the pot:

Here's a collage of the results:


My Conclusion:
TAG Gold and FAB Shimmer had about the same shine brushed on. TAG is a little easier and smoother when wetted and FAB would poop-out on my brush. The last upper teardrops became almost non-existent. All of the paints were shinier with the Mehron Powder but surprisingly, FAB behaved the best with it added in. It seem to make up for FAB's failings. My wish is that Mehron will do to the gold what they did to the silver which is put the powder in the paint so there is no additive stage.

D.

Tuesday, November 21, 2006

"Enviromentally safe" stripper is an oxymoron

Being the clever girl that I am I thought that I could simply strip the front door of three layers of paint with just a dab of stipper and a putty knife. They make it look so easy on the infomercials.

The first time I used Jasco and got most of the paint off. It was a huge mess and left a lot of paint behind. I ran out and had two other types of stippers that I got from my mom. They were "enviromentally safe" strippers and I swear if you're going to use stripper you might as well just use the real thing.

The other smell-good strippers didn't really penetrate the paint. They just rubberized it and never did dry out like the Jasco. The Jasco became "one" with the paint and when I would peel strips off there was no wetness to it. The next day I finally saw some bubbling but it was a huge mess to get it off.

I finally ended up just scraping alot of it off with this nifty scraper tool set I got at Harbor Freight (a moment of silence for the cheap tool capital of the world)....There is STILL little bits of paint left behind. I've got to strip the back side of stain & poly so I'll take another stab at Jasco in the cracks.

Lessons Learned:
Just use the strong strippers. I found that Jasco was easier to use, easier to clean up and didn't stink forever because it dries out.

If you are stripping (not the Las Vegas kind) Harbor Freight has a set of scrapers with a handle that has a dozen different shapes on it for scraping paint out of little crevices or trim.

Black Breathing

I'm determined to get miners lung I guess. I took down the shutters and hung them on the newly demolished wall downstairs because I hadn't removed all the drywall screws yet. I hung them up, opened the window for air, put on a mask and latex gloves and fired up the spray can.

I didn't really feel like it was hard to breathe or anything. The cramping in my finger (the bruise I felt for days) was worse but when I went to the bathroom I got a surprise. All around the bridge of my nose was black as coal. I guess drawing breath through the mask created a suction and drew the paint fumes in.

The shutters look great on the house. It really classed the front up. I also painted the trim around the door white and touched up the trim around the garage. Someone even asked when I painted the garage door...I didn't. I also painted the south garage door that was all green with white trim and flat beige paint and the back french doors.

To finish up the trim I put new white corners in to replace the aluminum ones that were ripped up and bent. That was a job because vinyl trim corners are designed to fit UNDER the siding so I had to cut off all the flanges and trim it down to slide onto the corner.

Lessons Learned:
Spray painting inside is usually not a good idea at all. I was lucky to have a room that needed to be painted top to bottom but how many times do we have one of those.

Don't try to match the siding when you are replacing the corners. I used the white that matched the soffit trim and it looks like it is custom. If I'd used the almond color it wouldn't have matched exactly and would have called attention to the fix.

Wednesday, October 25, 2006

Denise Got Her Flip Back

Here she is. 254 South Royal Ann in Orem. She's in Cherry Village, our neighborhood. I had been watching the house because I noticed that the owners had had a previous MLS listing in May for WAY too low a price as a "short sale". Well, in this good market, there is no reason to short sale...they had lots of equity.

So, I decided to talk to the wife and we saw her out and mentioned the previous listing. I told her that I wanted them to stay in Cherry Village for a while and I would buy their house and let them rent it for 2 years until their cute twin girls were out of high school (they are friends of the kids). She was adamant that the foreclosure had been taken care of and she would be silly "to let her equity go." Well, I think you can guess what happen...just that. I noticed the dreaded "trustee sale" in the paper about a week later and made arrangements for financing in case it made it to auction.

While we were in Disney on vacation they arranged a deal for an "investor" to buy the home from them. In exchange, they understood that they would have a lease option to buy the place back and would be staying in their home. It was all arranged by a sortof family member they thought they could trust. Well, they didn't get the paper work on the lease and ended up selling the home for just what they owed on it. Didn't get a dime of that infamous equity (they sold for $185,000 and it's actually worth about $240,000.) and the "investor" kicked them out as soon as he thought he had some buyers.

We found all this out little by little and felt badly that we weren't able to help them before they did this foolish thing. At the least I would have given them $220,000 so they would have some cash. We ended up buying it for $238,000 as is. Once it is fixed up we'll sell it for $275,00 - $290,000. A family just two houses down listed their home, similar in sq. ft., for $339,000 which is excellent for me.

Lesson Learned:

I've been seriously looking into working the preforeclosure market because at least I would give them SOME of their equity unlike most scam artist/investor types. I learned the hard way that the preforeclosure people make more money and don't have to lift a hammer.

An agent is not your agent unless you have an agreement signed with them. If you don't have that agreement they have no fudiciary responsibility to you and can make all kinds of promises.

Get everything in writing. My friends didn't get the lease signed at closing and were left out in the cold. Handshakes don't cut it anymore.

Tuesday, October 24, 2006

Sold All American!

We put the condo under contract in 10 days but the buyer's fell through. They weren't qualified (even though they assured me they were actually qualified for more). I don't know why their mortgage person wasn't straight with me the first time I called. Anyway.

Right after that deal fell through I got a call from two buyers. They were both interested and both saw it the same day. I ended up getting an offer from one. We had a little bit of a bumpy road because she wanted to give us a grocery list of stuff to fix and then wouldn't close at the end of the month when she had all her financing in place. We refused to show it to her daughter (petty I know) because she was going to stretch out closing another 2 weeks. But, it was all resolved. We sold it for 156,000 (I gave them a choice of 2,000 in closing costs or a price reduction.)

When all was said and done we only made about $6,000 on the whole deal. It would have been better to hold onto the condo and sell it to a contractor for $140,000 than to remodel but the experience was probably worth it.

I swore to my friends that I would never do another flip though....but guess what?

Lesson Learned:

Never buy a house that is totally outdated or badly remodeled. Fixing the bad DIY projects was worse than starting from scratch.

Don't believe buyers when they say they are qualified. Call their mortgage person before you sign the contract. Unqualified buyers waste your time and you may miss a potential QUALIFIED buyer by messing with them.

Use the 14-day ForSaleByOwner kit in Home Depot. For $14 dollars you can expose your house to thousands of buyers. I got tons of calls and "hits" on my listing. Cheaper than a newspaper ad and much more effective.

Tuesday, April 11, 2006

Monday, April 10, 2006

OPEN, OPEN, OPEN...

We finally set a deadline and had an open house on Saturday. On the Wednesday before I took all the kids up there to clean the stuff out of the basement and then we loaded some of it out on the truck. I had Emma and Josh deliver the 1/2 page invites to Three Fountain residents. Unfortunately a freakish 6 inches of snow had fallen on the bench and Emma, bless her heart, ended up calf-deep in slush. What was even stranger is the 70 degree weather we had for the open house just 2 days later!

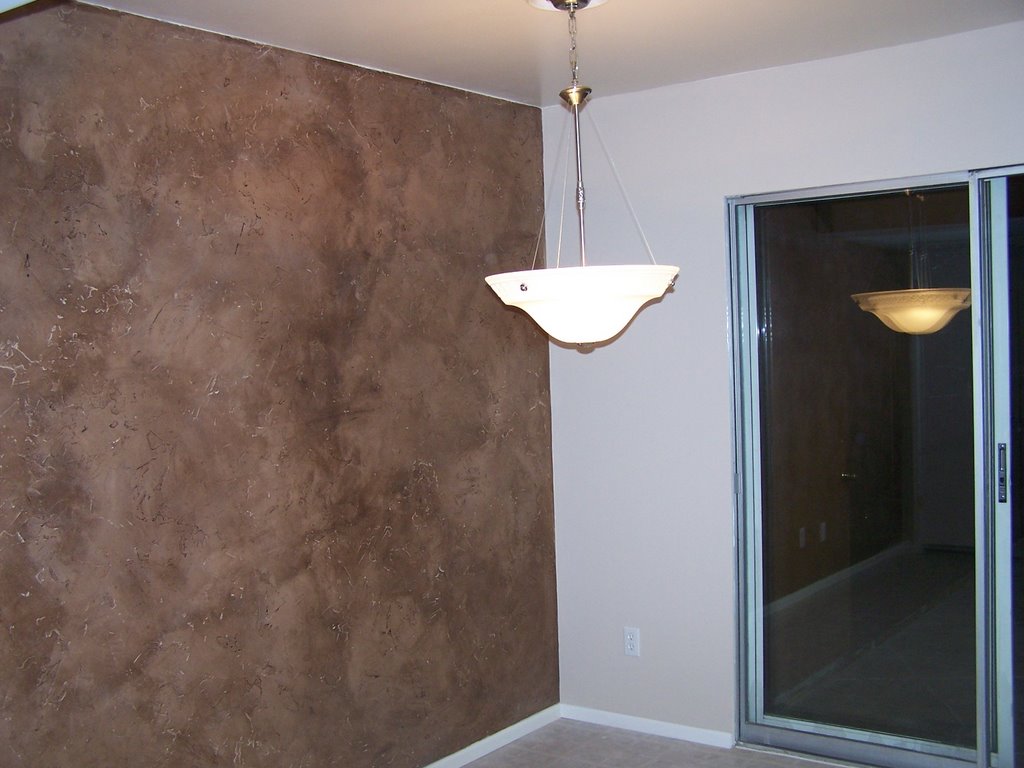
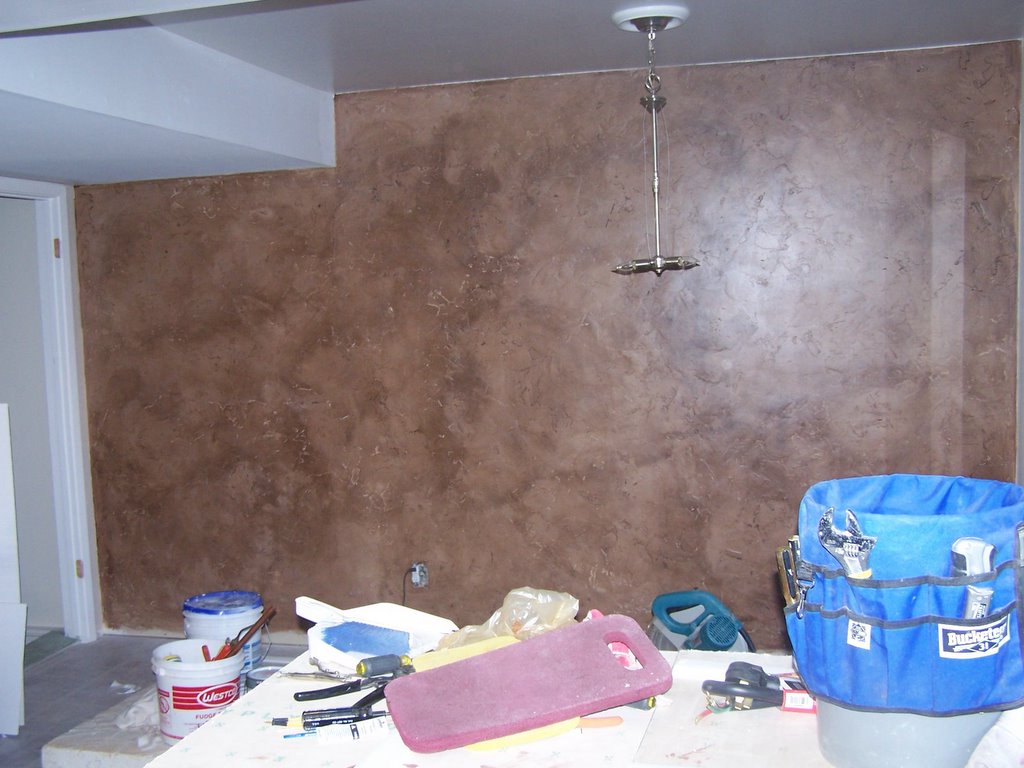
The response to the condition of the home was great. I had several people comment on the brown/leather wall and ask how I did it. Only about 3 people directly said they knew someone who might be interested but my stragedy was to get people in that neighbhorhood to hunt for their own neighbor.

No one was too thrilled with the price I set at $158,000 but almost everyone said I wouldn't have a problem selling it. The unit next door is only $148,500 and hasn't sold yet so I don't think price is the sticking point. I guess the market will make or break me.

We only have a $10,000 margin at $158,000 so if I have to start paying realtors or reducing the price I won't have made any money. It is a delicate balance.

There are three things that effect the sale of real estate. Location, Condition & Price. From the response condition won't be a problem. Location is good; the east bench of Provo and near the Riverwoods shopping center but it's still quiet. The last is price and that may be what kills me. So many people have undersold their units that they really aren't up to market. In Orem the same size home is about 185,000.

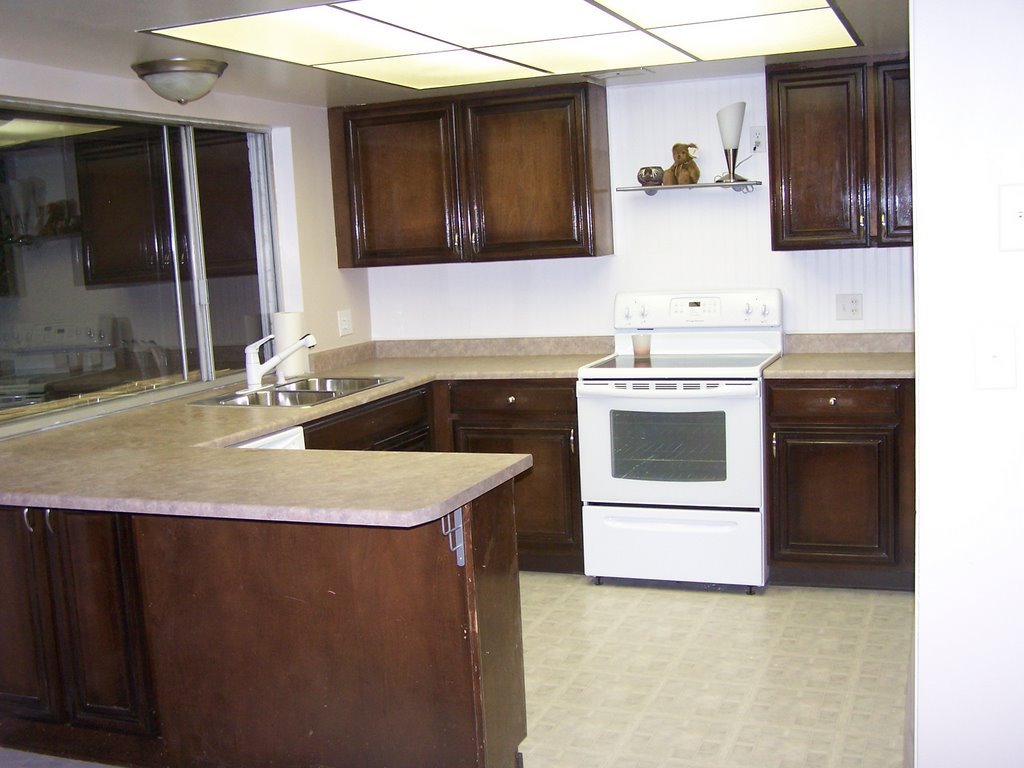
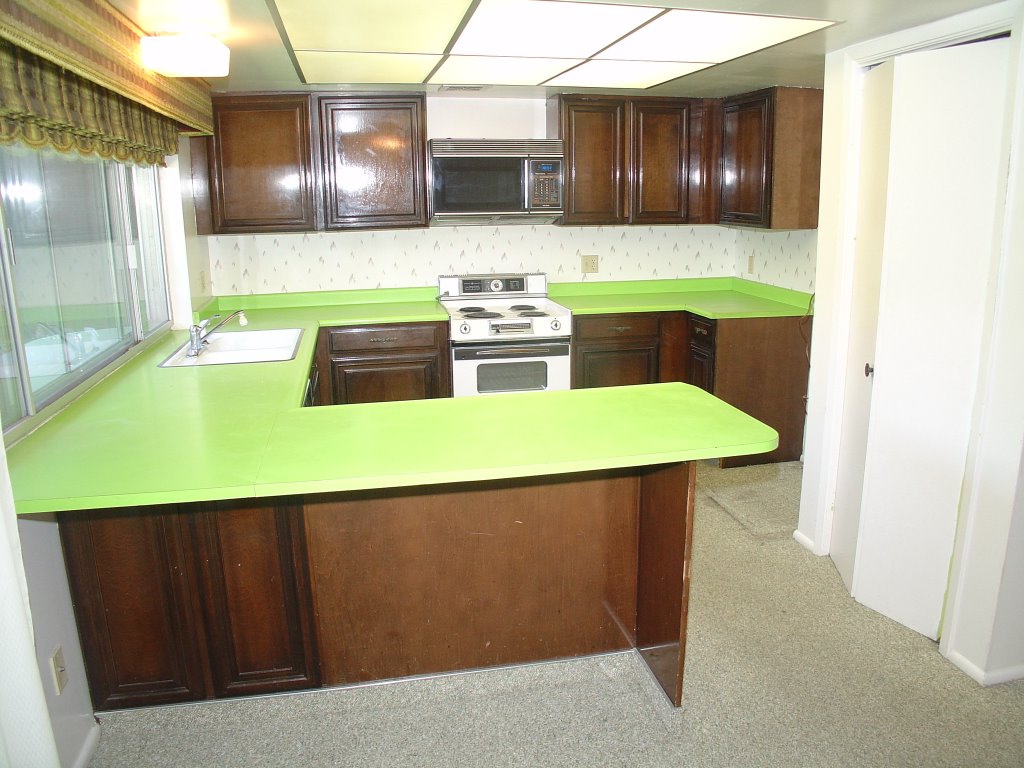
Next post will be the pictures I took. I haven't taken daytime pictures yet but these will give you a good idea of the finished product.

Lessons Learned:

Advertise heavily in the neighborhood when trying to sell a home. People who live there usually love a neighborhood and can convince a friend or family member better than you ever can.

Price is everything. Even a home in a horrible neighborhood can sell if it is priced low. If you want top dollar, though, your condition has to be above average "model" style.

Older people would rather have a bifold than a curtain. I love the curtain I installed on the pantry but I had 6 people ask where the door was. Grrr.

Sunday, April 02, 2006

Anyone got a little dutch boy?

And I don't mean the paint.

I put a hole in a copper water pipe. What is even worse is that the whole wall behind that same water pipe was exposed so I had no excuse to put a screw through it.

My only rationale is my own vanity. I wanted the screws to look even. EVEN THOUGH the screw I had just put in BARELY missed the pipe the first time I HAD to put the next screw directly parallel to that one. Boy I have a good eye; but boy, my brain shut off.

I was trying to hit the stud but the plumber had notched out an opening in the stud for the pipe to travel through. When my drilling felt weird I went to the back and saw no signs of drill bit so I thought I must have hit the stud and because I couldn't see anything.

When I backed out the screw to make another go...sprishshsplashspray....well, you get the idea. Remembering my first aid (never remove an object embedded in a person...let the hospital kill them,) I screwed the screw back in to stop the flow and shut off the main.

Took Jeff and I almost 2 hours to fix it. We had to melt a weld, cut through the pipe on the other side, put in a new section, re-weld and weld the new section in. Of course the new weld at the cut didn't work because of water in the pipes (I didn't want Jeff to do his bread trick because I didn't think it would make it past the sink supply lines.) The water cooled the weld too much.

I tried to blow the water back up the pipe and it ended up sending about a cup of water back out at me. Luckily I was "smart" enough to have turn off the 220 Volt dryer outlet before we started. We ended up blowing a chunk of bread up the pipe and that seemed to stem the water flow enough to make the weld.

I'm thinking of making a necklace out of my little section of pipe.

Lesson's Learned:

You can't weld pipe with water in it. The bread trick works and it even made it past 3/8ths supply lines (I did remove the faucet screen though.)

You might want to cut a peep hole when installing a vanity or cabinet mirror behind a sink in the basement. There WILL be supply/drainage pipes SOMEWHERE!

Know where your water main shut-off is even if you think you won't need it.

When crowsfeet are a good thing

The last bedroom is done. It is definately the most "lipstick on a pig" room. The construction in that room was almost as bad as the hallway and in some ways I might have saved time just ripping out these walls as well.

I did end up scraping the cottage-cheese acoustical texture off and it left behind tracks of mud and under that I could see the same crappy seams that were on the wall. Cottage cheese is for lazy-assed builders who don't want to make a good ceiling. Anyway...

At first I tried to texture like we did at home with small globs applied and then troweled but it was killing me. It's probably the most time intensive way.

Jeff had suggested we try the crows feet brush that we saw at Lowe's. I told him that it was used for ceilings and he thought it would be a good idea. I ended up sanding down the texture I had started and got out a paint tray liner and filled it with mud, put the brush at the end of a handle and stamped the brush into the mud.

I randomly mushed the pattern, twisting the brush around to different angles. If I got too much mud on the first tamp then I would go back over it again to lift off some of the mud. About half way through I had to wash out the brush because I stopped getting a sunburst and started getting sploosh. I just swished it around in a clean toilet and flush a few times.

After you apply the mud you have to wait about 5-10 mins to knock down the texture or you will just drag the mud across and ruin the pattern. Don't wait too long or you will drag lines in the mud. I used a 10 inch mud knife for the knock down.

I love the pattern and will probably use it in my bedroom over a very dark color. After it dries I'll probably "dye" it with a glaze so I don't cover up the dark paint underneath.

This is one of the few things that makes me glad we did the remodel. I love finding new and wonderful ways of doing things.

Lessons Learned:

Spending $8 for a crowsfoot brush saved me about 2 hours of time

Sometimes, very rarely, Jeff is right! :P

Remember that little 1/4 inch?

The 1/4 inch that put me under when I was putting in the beadboard backsplash? Well it has come back to haunt me. Yesterday I went to open the lovely drawer for the work table in the basement and it hit the trim. Another one of Dave's Construction "a contractor should know better" moments"..shouldn't a contractor know that he needed to leave space for the drawer to clear the door frame? Grrrr. Well, now our choices are to leave it be (drawer opening about 8 inches) or move the whole cabinet over 1/2 inch (and redoing the trim and adding a spacer).

Luckily I'm way past nervous breakdowns. My eyes are glassing over now...I believe it's called catatonic.

It looked so good too. I had put in the flooring at the base covering up the cement. I'm even starting to like the daffodile pattern that came as a total surprise (didn't show through the little window of the Armstrong box...I could have sworn I looked at the pattern. I must have been too busy beating people off at the Lowe's sidewalk sale.) But everything was so nice and then CLUNK.

Jeff and I will probably move the whole cabinet over and just adjust the trim. It really won't be that big of a deal; at least not compared to what we've been through but I'm tired and scared.

It's ironic that the better the place looks the worse it looks in my eyes. This must be what it is like for an anorexic. The skinner they get the fatter they seem to themselves. Now I start to notice little things. I have to stop myself from desiring perfection.

I looked at the before pictures again tonight. Sometimes you just need a reminder of how far you've come.

Lessons Learned:

Don't hire Dave's Construction (just a reminder for those that haven't read the whole blog.)

Make sure your drawers, doors & cupboards clear obstructions.

NO means on...

"It won't be that bad. They'll see "NO" and know that it means "ON"...right?" Oh, the rationalizations we make. A couple of weeks ago I had a mountain out of a molehill moment. I went to turn on a light switch that I had been working on and realized that I had put it in upside down. Now mind you, I had just spent 2 hours over two days figuring out an end-of-line 3-way switch (the hardest kind apparently...the book said 'this usually isn't done this way because it is so difficult to diagnose'...ya think?) right next to it and it was such a small thing. So why did it make me so depressed? I tried to tell myself that people will figure it out when they go to flip the switch but then my common sense told me that it will only take 10 mins to go turn off the circuit, unscrew the face plate, unscrew the switch and flip it. No big deal.

But it's those 10 minutes here and there that have made this 6 week makeover take 6 months.

Lesson Learned:

The power for two 3-way switches that come at the end of the line needs to go clear to the end switch then come back. If not you will shut power off and never figure out the secret combination of on and off.

When your switch says NO listen to it.

Wednesday, February 08, 2006

Wednesday, January 25, 2006

Liking the Leather

I did a crazy thing...or at least it may be a crazy thing when people start calling my condo the "brown wall" place. I faux painted the textured walls a deep, rich, leather-like brown. Will the leather look kill a sale or help my house have that designer touch...hmmm.

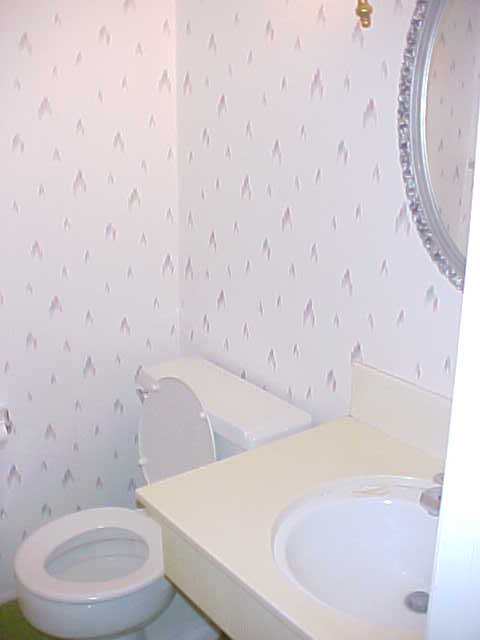
I had textured the dining wall because we had to rip out barn wood and it left huge holes and patches of glue. That was one of my first projects. When I finally got to the 1/2 bath, just off the dining room, the surface there couldn't be saved either so I started texturizing two of the walls there (and ceiling too) and planned on beadboard paneling for the other two sides.

I had a light chocolate brown that I had bought for Crystal on one of her drama runs (those "I must have this now!" tantrums that only mothers of teens will understand) and so I painted the textured wall in that. I found that it was too flat so I tried to dry brush a lighter color to highlight the texture and it was still too flat-ish.

Well, I just went for it and got out my left-over walnut gel stain and started rubbing the walls. I LOVE IT! The stain made little puddles in the crevices and gave the whole wall a sheen and texture where the stain overlaps.


It is very dark and I know that not everyone will love it so I am taking a chance. I even warned Jeff in the car on the way over "I know that you will probably not like it but I do so you must not say anything bad because it's really cool." But Jeff has never been a good liar (which is the reason I always beat him in poker) and so he didn't even have to say anything...I could see it in his not-so-poker face.

Of course, I'm planning on doing this technique in our house...Jeff better start practicing his lying skills!

Lessons learned:

Will someone please tell Denise that this is a flip and not her personal home? I probably should have just painted it white and left it that way...but my gamble may pay off by setting my condo apart from the crowd.

Always wear gloves when you are staining...duh! It took me 3 days and many bathtubs to remove the walnut from my crevices (not those crevices!)

What's that dripping sound?

You know how hard it is to come back from a vacation and go to work? Well, when you are still working on a remodel that was supposed to be done by Halloween (ahh...the visions of cute refreshments and fall leaves are still dancing in my head) and it's the dead of winter and there is 6" of snow on the ground...well, I find that nearly impossible!

Jeff and I have worked our way to the kitchen...the mother of all remodeling rooms because there is electricity, plumbing, trim, windows, etc. and doubly so because we are working on the half-bath at the same time.

Just about the time we start making progress the "gremlins" come out and start wreaking havoc. We'll be buzzing along and then it seems that all hell breaks loose and we have trip after trip to Home Depot.

We got new valves for the kitchen sink and for the 1/2 bath. Jeff was having trouble putting in the valve for the kitchen and I was downstairs turning the main off and on. Well, the valve was leaking so Jeff had me turn off the water.

As I'm coming up the stairs I distinctly heard a "drip, drip, drip" sound. I went to the sound of the water and heard it dripping through the laundry chute. I thought it was the sink downstairs that I had turned on to lower the house water pressure but when I got downstairs I heard it in the laundry room. Water was everywhere on the floor and dripping from the ceiling. I went upstairs and opened my new vanity cabinet and found a huge puddle of water.

We had removed the shredded handle of the valve to try and see if it could be replaced, the valve was still opened (by the gremlins of course) so when I turned on the water there was a literal cascade in the cabinet and it made it down the wall and under the cabinet itself. Bad gremlins! I wonder if a feng shui space clearing would get rid of gremlins?

I also had a bad case of the gremlins when I wired a hot white (not marked by the electrician who wired the place...must be part gremlin) to a neutral white and got a lovely "pop" sound right before the circuit "broke". Luckily it didn't blow the whole house like last time. Anyway...we have 3-way light in the dining area thanks to the Orem Library...again.

Lessons learned:

"Drip, drip, drip" is never a good sound when you are remodeling....NEVER! It either means paint, water or stain is ruining something.

MARK YOUR HOT WHITES! PLEASE! For the sake of all amature electricians who follow in your footsteps.

Gremlins eat money.

Dave Arrggghhh....Part Trois: Small Claims

Well I won in small claims court against Dave's Construction...of course I haven't seen any money from it but what do you expect from someone like that.

I came over-prepared with email printouts, pictures, receipts, etc. but the judge didn't want to see anything before it was mentioned so as not to prejudice the case. I was champing at the bit to tell the judge everything that happened but restrained myself to the billing error...at least at the beginning.

Jeff says that Dave really couldn't get a word in edgewise because I dominated the proceedings. Nothing that I told the judge about Dave was even contested by Dave. The judge would stop every once-in-awhile and ask if what I was saying was accurate and he would say "yes" so it went pretty smoothly. Dave made Kim (his estimator) and a drywall guy show up to go with him...I hope they charged him for the time, and they didn't even get to speak (tee, hee) and the judge didn't call on Jeff either.

I did manage to sneek in that the quality of the workmanship wasn't good but that I wasn't contesting that at this time...that I was trying to be fair (we'll get back to that later) and that I just wanted to pay for what I got, not be tied to a bill that had radically changed throughout this whole process. Dave said "quality was never mentioned before" but the judge didn't take the bait.

Toward the end of the proceedings, after the judge started subtracting all of the stuff that Dave didn't do off the original bill, he turned to Dave and said "Do any of these changes sound off to you?" Dave boomed out loud and clear "God gave me the talent to build things but unfortunately he didn't make me a good businessman. I leave it up to your judgement, sir."

Well, doesn't that about sum it up? I've been trying to be fair with Dave and instead of looking at his numbers and seeing if he was wrong (and making two businessmen show up to court with him) he was just railroading me because he's not a "business man" and doesn't want to admit he was wrong...and I'm being kind and giving him the benefit of the doubt by assuming even that.

Well, I'm waiting to see if he's going to drag this out. He has about 15 more days of his 30 days to file an appeal and I'm afraid he's going to do it just to tick me off. If he does, I'm going to bring up the quality issues and go for the throat. When I'm done basting him, he'll not only owe the original amount, plus court costs, plus 6% interest...he'll have to give me back the money that I gave him for counter installation, the door he put in that won't open when the dryer is in, the labor of putting back the trim he should have reinstalled and anything else I can think of.....grrrr.

On his way out we heard Dave say "I guess we're working for free now" to his buddies. Well, if you consider $555 for 4 hours of work "free" I wonder what you charge people who aren't paying attention.

And so my lessons learned are:

Changes have to be in writing. Don't let the contractor do any work until you have a finalized estimation. Don't leave anything on the bill that says "may change if more work is involved" or any other open ended billing.

The judge told me that if I disagreed with the bill I should write on my check "Paid under Protest" in the comments section so that there was an understanding that I may file legal claim against him and he has no claim for a lien on my home.

I was very frustrated that Dave was acting as a contractor without my knowlege. If you can find out what will be subcontracted and what will be done by the contractor himself. If the contractor doesn't pay the subs you may end up with a lien even if you paid in full. Wise remodelers ask for lien releases from the subs so you're covered.

If you have to take someone to court DON'T BE NICE!!!! Let them ask for the extra consideration, don't just hand it to them. If I had just gone with the original bill and subtracted what he didn't do I would have had about $200 more than the judgement I was awarded. The judge even said "What's the $149 difference" and I just said "I gave him some for labor and extra drywall." Why didn't I make Dave justify that?

And finally...don't hire Dave's Construction or any service run by David Albers. In his own words he's "not a good businessman!"